How to Successfully Propagate Roses from Stecklinge
Understanding Stecklinge for Rose Propagation
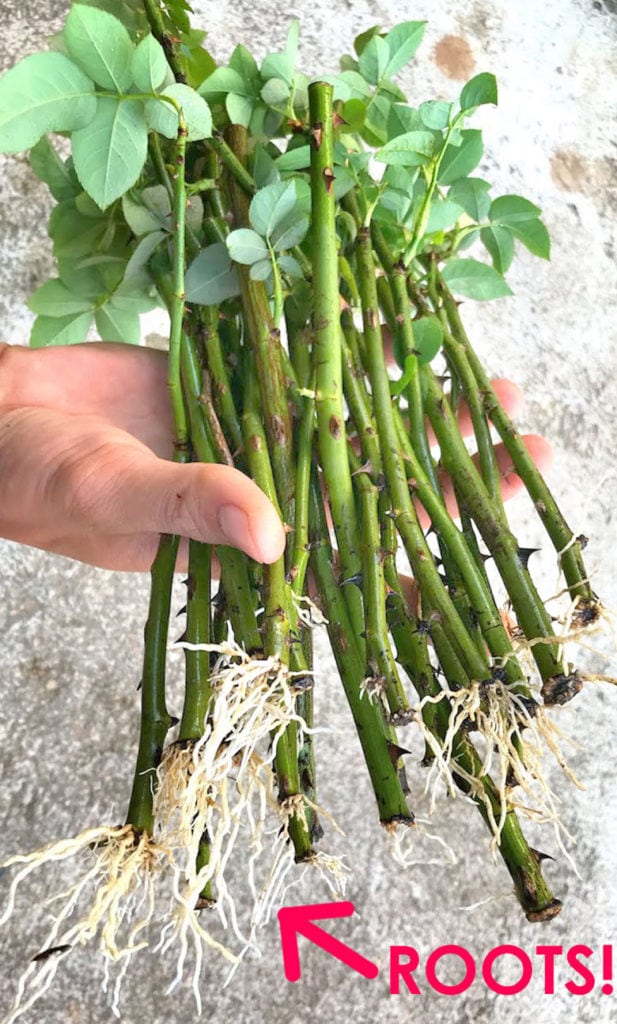
Propagating roses from stecklinge, or cuttings, is a tried and true method for gardeners looking to expand their rose garden without the added cost of purchasing new plants. This approach allows you to take a cutting from your favorite rose, encouraging root development and new growth in a controlled environment. Successful propagation not only saves money but can also preserve and promote well-loved cultivars. In the following sections, we will explore the best techniques for propagating roses from cuttings, essential tools needed, and provide practical tips to ensure robust future blooms.
Choosing the Right Cuttings
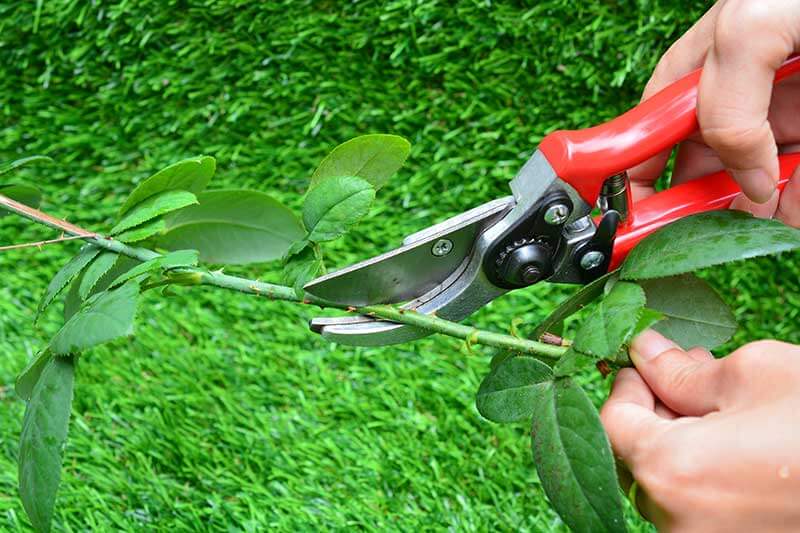
When it comes to propagating roses from stecklinge, the choice of the cutting is crucial. The best time to take cuttings is during the late spring to early summer when the plant is full of vigor. Look for stems that are healthy and free from disease and pests. A cutting should ideally be 6-8 inches long, with at least one set of leaves left intact. After taking the cutting, immediately remove any flowers or flower buds present to allow the plant’s focus to be on root development. Using healthy, vigorous cuttings will significantly enhance your chances of successful rose propagation.
Preparing Your Cuttings for Propagation
Once the cuttings have been selected, the next step is to prepare them for propagation. Begin by removing the leaves from the lower half of your cutting, leaving only a few leaves at the top, which will help minimize water loss. To encourage rooting, consider dipping the base of the cutting in rooting hormone. This plant growth regulator helps stimulate root development. After preparation, you can proceed to choose your medium, which can either be soil or water. Each method has its benefits; soil offers a more traditional approach while water allows for visibility in the rooting process.

How to Root Your Cuttings
Rooting stecklinge can be done in either water or soil, and while both methods are effective, they come with specific advantages. If you choose to root in water, place the prepared cuttings in a clear container filled with water. Ensure the lower nodes are submerged but keep the leaves above the water to prevent rot. Change the water weekly to keep it fresh. You should see roots developing in 2-3 weeks, at which point you can transfer them to soil.
If you prefer to use soil, fill a small pot with well-draining soil and make a hole with a pencil or stick for the cutting. Insert the cutting into the hole and gently pack the soil around it. Water the pot thoroughly and cover it with a plastic bag or a plastic dome to maintain humidity. This mini-greenhouse effect will create optimal conditions for root development. Keep your cuttings in a warm, bright location but away from direct sunlight until they establish roots.

Maintaining Your Stecklinge for Optimal Growth
Once your cuttings begin to root, it’s essential to maintain a suitable environment for healthy growth. Plants that are already stressed from the propagation process need to be cared for properly to flourish. This section will discuss the significance of humidity, light, and temperature in nurturing your {\bf rose cuttings}.
Humidity and Monitoring
Humidity plays a vital role in the germination and growth of rose cuttings. Maintaining a high humidity level helps prevent the cutting from drying out. If you’ve covered your cuttings in a plastic bag, ensure to monitor them regularly for condensation. Too much moisture promotes mold growth, which can damage your cutting, while too little can cause wilting. As your cuttings establish roots, you can gradually reduce the humidity by removing the bag for a few hours each day until the plants acclimatize.
Light Requirements for Root Development
Light is critical for healthy growth; however, direct sunlight can be too harsh for newly rooted cuttings. Place the pots in a location where they’ll receive indirect light for most of the day. A bright, east-facing window is often ideal. If natural light is limited, consider using fluorescent grow lights. As the cuttings grow stronger and more established, you can slowly introduce them to direct sunlight.
Watering Techniques
The method of watering is another key factor in ensuring that your stecklinge thrive. In the initial stages, it’s advisable to keep the soil moist, but not soggy. Overwatering can lead to root rot, so consider using pots with drainage holes to allow excess moisture to escape. Test the soil’s moisture by inserting a finger; if it feels dry an inch below the surface, it’s time to water. As the cuttings mature and develop a stronger root system, reduce watering frequencies, allowing the top inch of soil to dry out before dampening it again.
Transplanting Your New Roses
Once your cuttings have developed roots, usually within 4-6 weeks, they will need to be transplanted into larger pots or directly into your garden. Successful transplantation is essential for thriving future roses. This section will delve into when and how to carry out the transplanting process.
When to Transplant Rose Cuttings
The right timing for transplantation plays a significant role in the long-term success of your propagated roses. Ideally, roots should be at least a few inches long before you even consider transplanting. Also, observe the foliage; once the cuttings of your roses start producing new leaves, it is typically a sign that the plant is ready for the transition. Avoid transplanting during the hottest parts of summer; early spring or early fall are deemed optimal. Cold temperatures can harm a young plant, and hot sun can stress it further.
The Transplanting Process
When you’ve determined it’s time to transplant, prepare a larger pot with fresh potting soil. Carefully remove the cutting from the initial container, taking care not to disturb the delicate root system. Place the cutting into the larger pot, filling in around the base with soil. Water thoroughly once planted, and consider providing some shade for a few days to help the plant adjust to its new environment. After sufficient acclimatization, your new roses can join your garden or another sunny spot of your choice.
Care After Transplantation
Once your cuttings are securely transplanted, give them the extra TLC they need to adapt to their new environment. Keep them adequately watered, monitor for any pests or diseases, and ensure they receive adequate sunlight. As the roses begin to establish, they will mature and bloom beautifully, giving you a sense of accomplishment for successfully propagating them.
Key Takeaways
- Choose healthy, vigorous stems for optimal propagation results.
- Use rooting hormone to enhance root development in cuttings.
- Maintain proper humidity, light, and watering for cuttings.
- Transplant at the right time, ensuring roots are at least several inches long.
- Edit your care routine to help plants adjust post-transplant effectively.
FAQ
1. What is the best time of year to take rose cuttings?
The best time to take rose cuttings is during late spring to early summer when the plants are most vigorous. It’s important to select healthy stems that will likely generate strong roots.
2. Can all types of roses be propagated from cuttings?
While most types of roses can be propagated from cuttings, certain varieties, such as hybrid teas, typically respond better than others. Always research the specific variety you intend to propagate.
3. How long does it take for rose cuttings to root?
Rose cuttings generally take about 4-6 weeks to develop roots, depending on environmental conditions and the care received. It’s vital to keep monitoring their progress during that time.
4. Should I use rooting hormone on my rose cuttings?
Using rooting hormone is not mandatory but is highly recommended as it can significantly improve the chances of successful root development in rose cuttings.
5. What should I do if my cuttings do not grow roots?
If your cuttings do not grow roots, consider evaluating your propagation environment, including moisture, light exposure, and the health of the cutting itself. Sometimes, adjusting these factors can help.
6. Do I need to fertilize rose cuttings?
Initially, it’s not recommended to fertilize your rose cuttings. They require time to settle in, and fertilization should begin only once the cuttings are established, usually at the early budding stage.
7. Can I propagate roses indoors?
Absolutely! You can propagate roses indoors by utilizing a sunny windowsill or under grow lights for optimal light exposure, along with maintaining humidity levels for successful growth.
